Server - Computer Datasheet Editor
The Computer Data Sheet plugin is used to display computer information based on the computer's type (desktop, server, etc.).
The tool is divided into two sections: Type Mapping and Sheet Configuration.
Structure
The Computer Data Sheet plugin consists of 3+n XML files.
ComputerDataSheet_Data.xml
This file contains a default configuration for easily creating additional data sheets.
ComputerDataSheet_DesktopData.xml
This file contains a preconfigured data sheet for displaying the necessary information about a desktop PC.
ComputerDataSheet_ServerData.xml
A preconfigured data sheet for displaying server data.
ComputerDataSheet_TypeMapping.xml
This file specifies which data sheet is used for which device selection. This is controlled by an SQL query whose return value enables the computer type to be identified.
Additional data sheets for devices can be added at any time as needed, and existing ones can be customized to suit your specific requirements. Each data sheet consists of a name and an SQL query for the desired type mapping. Every SQL query includes the placeholder ResourceId, which corresponds to the selected computer in the program.
A data row in the data sheet contains the following information:
- Icon
- Name contacts
- Enabled/Disabled
Configuration is simple and convenient using the Computer Data Sheet Editor.
Here you will find the data rows for the selected type mapping.
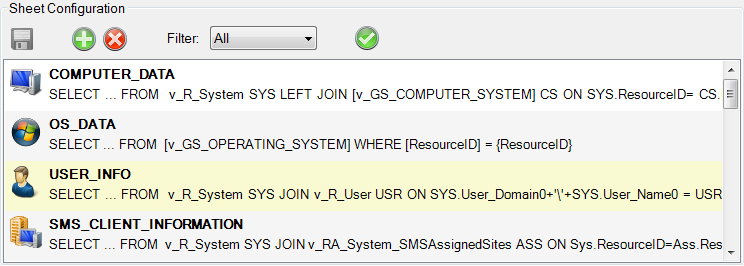
An edited data sheet is saved by clicking  . New data rows can be created using
  , [[Insert], or the context menu. Unneeded rows can be deleted using
  , [Delete], or the context menu. The position of a row can be changed either by dragging and dropping or via the context menu. To edit an item, select it by double-clicking or pressing [Enter]. For a clearer view, use the filter drop-down menu to choose whether to display all rows, only selected rows, or only deselected rows.
You can use  to test the functionality of the SQL queries for all displayed data series. Changes made in the datasheet are not written to the corresponding file until you save them; at that point, a backup of the latest version is automatically created in the backup folder.
Configuration
The “General” category is where you configure the basic settings for using the Computer Data Sheet.
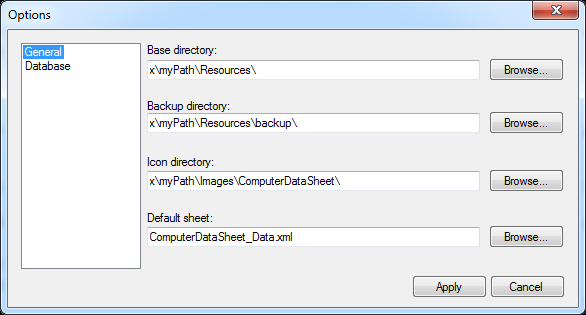
- Base directory The directory where the XML files are located.
- Backup directory Backups of the data sheets are stored in this directory. If no path is specified, backups are disabled.
- Icon directory The image files to be displayed are stored here.
- Default sheet The default data sheet
Database Settings
The Database category is used to specify the database to be used.

You can use the ![]() button to test the connection details you entered before saving them.
button to test the connection details you entered before saving them.
Type Mapping
Type mapping specifies which data sheet is used for each device selection.

The data sheet to be displayed is selected via

New type mappings, including data sheets, can be added using , those no longer needed can be removed using , and the type mapping and name can be edited using  .
.
Create or edit type mappings
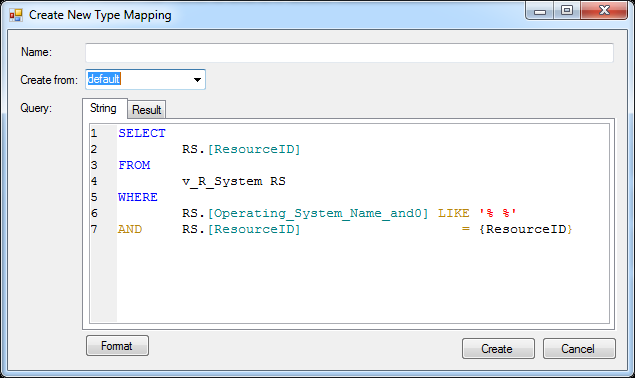
Each data sheet includes its name and an SQL query for type mapping. Both can be modified at any time. When creating a new type mapping, you can specify under “Create from” whether to create a blank data sheet or whether the new data sheet should be derived from the default or an existing data sheet.
For convenient editing, two tabs are available under the “Query” section: “String” and “Result.” In the ‘String’ tab, you enter the desired SQL query, and syntax highlighting provides visual support for your input. For optimal display, the SQL query text can be formatted using the  button. The “Result” tab allows you to test the SQL query directly and view the return value.
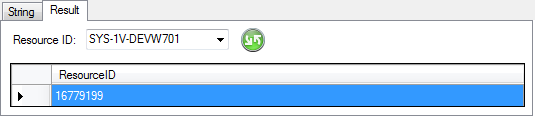
Under “Resource ID,” you can select from all computers entered in the database. Clicking [Execute] runs the SQL query and displays the results, or an error message if the SQL query is invalid.
Create/Edit Data Series
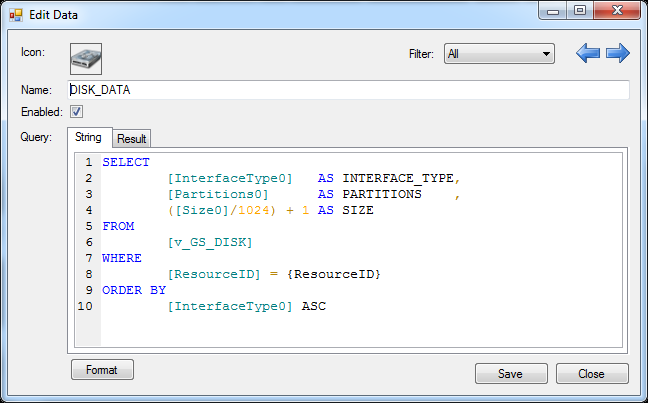
Each data series has its own icon, name, enabled or disabled status, and an SQL query. This data can be modified at any time. Here, too, the String and Result tabs are available for editing the SQL query.
In the String tab, enter the desired SQL query; syntax highlighting provides visual support for your input. For optimal display, the SQL query text can be formatted using the button.
The Result tab allows you to test the SQL query directly and view the return value.
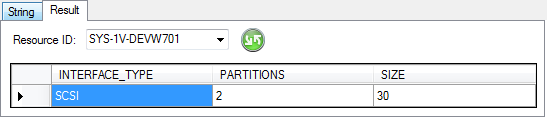
Under “Resource ID,” you can select from all computers entered in the database. Clicking  executes the SQL query and displays the results, or an error message if the SQL query is invalid. While a data set is open, you can use
 ![]() and
and ![]() to navigate through the data sets selected in the filter combo box. Multiple windows can be opened simultaneously for editing and comparing data.
to navigate through the data sets selected in the filter combo box. Multiple windows can be opened simultaneously for editing and comparing data.