OS Deployment
The operating system deployment feature in SCCM enables the deployment of a Windows operating system to both managed and unmanaged computers using bootable media.
- Managed computers
- Computers with an operating system and SCCM client
- Unmanaged computers
- Computers with an operating system but without an SCCM client
- Computers without an operating system (bare-metal deployment / initial installations)
The operating system is deployed using a bootable medium, such as a USB flash drive, or via network boot using PXE.
To add new systems—such as desktops, laptops, or tablets—to SCCM management, a standardized operating system installation is performed. The process is initiated using the SCCM Manager plug-in “Client Creator.”
Client Creator initiates an automatic operating system installation that installs all drivers as well as software products defined as standard. This process within SCCM is called a task sequence.
Client Creator
The Client Creator plugin is preinstalled in Computer Management, which can be accessed via the function groups. After selecting the Client Creator plugin, a new tab opens:
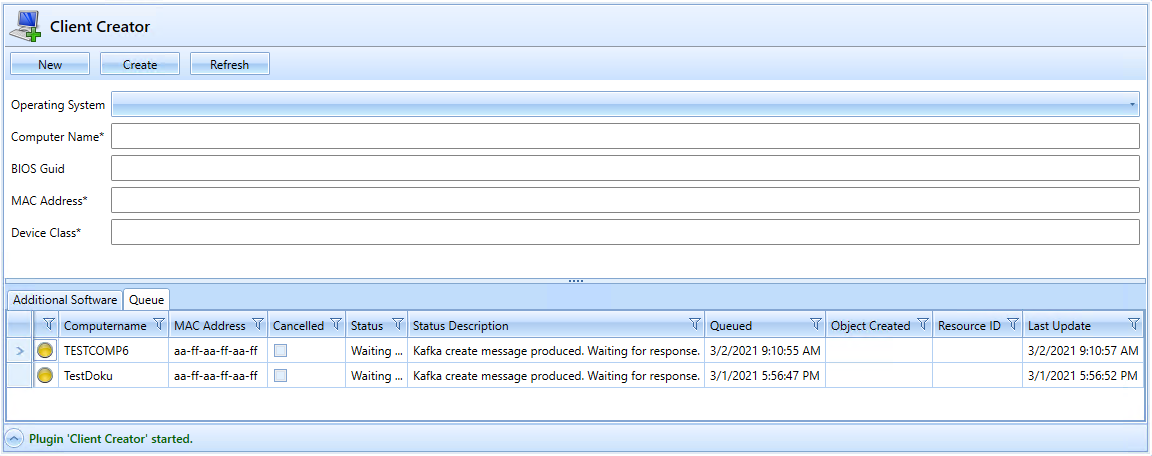
To achieve a high degree of standardization, a wide range of predefined values (computer variables) can be selected here using drop-down menus. (For more information, see the plugin description.)
Sample Configuration
According to a sample configuration, the following fields must be filled in or selected:
Internal Fields
Operating System (selection)
All currently supported operating systems are listed here.
Computer name (text)
Enter the computer name here. It must be entered in uppercase letters, without special characters, and must be no longer than 15 characters. A syntax check is performed automatically.
MAC address (text)
Enter the MAC address of the computer on which the software is to be installed here.
Computer variables
Domain Name (Dropdown)
This dropdown lists all domains in which a client may be deployed from this server.
OU Name (Dropdown)
Enter the LDAP string of the OU in which the computer is to be located after installation.
Location (Dropdown)
The “Location” dropdown is used to specify the location where the computer will later be deployed; based on the location, settings and software products applicable to the computer are determined, among other things.
Environment / Role (Dropdown)
The role determines the intended use of a computer. Specific settings and software products for the system are also linked to the selected role.
Assign Collections
By clicking the Assign Collections button, you can add additional collections to the computer in addition to the software installed by the task sequence.
Applications (software installations) are linked to these collections and will be installed after the task sequence completes. There are two options available. First, there is the Add option, which allows you to select from all available installation collections. Second, there is the Migration option, which allows you to import collections from an existing computer.
If the Add option is selected, a dialog box opens for selecting collections. Here, you can choose from all shared installation collections. Selecting the collections will install the corresponding applications after the task sequence runs. To add the desired collection, select it and click the plus sign.
If the Migration option is selected, the migration window opens. On the left side, you can select from the available computers. Once a computer is selected, all installation collections containing that computer are displayed on the right side. Select the required collections from the computer’s collections. Click the Apply button to add the selected collections.
Import
To create multiple computers at once and add them to the SCCM environment, you can import a pre-populated list.
To do this, click the “Import” button.
A window will open where you can select the comma-separated .txt file to be imported.
The file to be imported must be in the following format:
<COMPUTERNAME>,<MAC-ADRESSE>
It is important that the computer name is written in uppercase letters. A comma is used as the separator between the computer name and the MAC address.
The imported computers are now displayed at the bottom of the Client Creator. For example, if an incorrect MAC address is stored for a computer in the .txt file, a corresponding description text will appear in the “Error” column, and the corresponding computer cannot be created. If the Import function is used, the two fields “Computer Name” and “MAC Address” in the upper section of the Client Creator remain empty. To add the computers to the task sequence collection, you must click the “Create” button.
The “New” button can be used to start a new import process or the next individual computer creation process.
USB Boot using WinPE
In order to install the new operating system on a computer, it must be booted into the SCCM WinPE environment.
To do this, the appropriate USB drive must be connected to the computer during the boot process.
Additionally, you must ensure—either through the boot order or the boot selection menu—that the USB drive is set as the first boot device.
After the boot process, the client installation begins. Once the hard drives have been formatted, the USB drive can and should be removed. This prevents the system from booting from the USB drive again upon reboot. From this point on, the automated operating system installation proceeds. During this process, the computer may restart several times.
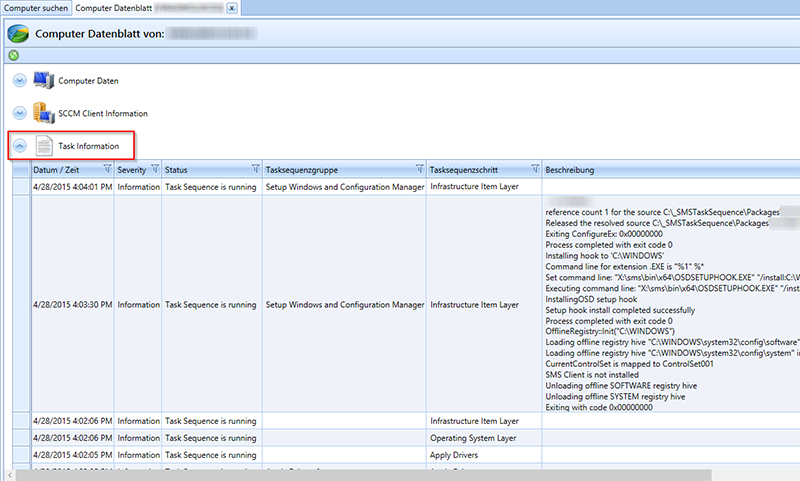
Task information
To view information about the progress of the task sequence and, consequently, the operating system deployment on a computer, use the “Computer Datasheet” plugin. The plugin is located within the “Computer Management” feature group. After launching the plugin, a new tab will open there.
The current status of the operating system deployment is displayed under the “Task Information” section.
Task sequence Log
In addition, the “Custom Logs” plugin allows you to view specific logs.