Asset Manager Update (Version 3 to 4)
The following chapter describes the individual steps, in the order they must be performed, required to update the Asset Manager from version 3 to version 4.
Backing Up the Asset Manager Database
Before updating the Asset Manager from version 3 to version 4, it is essential to back up the Asset Manager database first, as the update can only be performed once and cannot be undone.
Installing the Asset Manager Service
After performing the backup described above and uninstalling Asset Manager Web Services 3.x, you can first run the setup for the Asset Manager Service. You must select the previously used (and backed up) Asset Manager database so that it can be updated. The setup will indicate that the database already exists. You can confirm this dialog by clicking Yes.
Installing the Asset Manager
After uninstalling Asset Manager 3.x, you can first run the setup for the Asset Manager. There are no special considerations to note here.
First Launch of the Asset Manager
After installing Asset Manager 4, it must be launched once as follows:
AssetManager.exe -Convert34After entering the connection to the Asset Manager Service, launching the program with the parameter mentioned above causes the Asset Manager to open with three additional buttons:

These three buttons must be clicked exactly once, from top to bottom. While the Variables & Drilldown Converter and SQL Job Converter buttons simply display an OK message, after clicking the Form Converter button, you must click the Convert button once to start the conversion process:
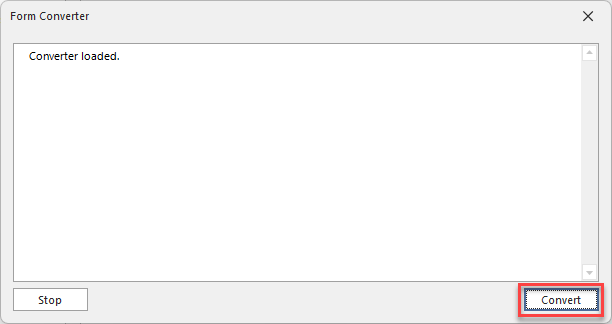
You can then close the dialog. After clicking the last button, all buttons are hidden for security reasons.
Afterward, the Asset Manager must be closed and restarted.
Once restarted, the update is complete.