Creation
Before you create applications, you must connect to the site server.
Then the tab Create Application must be selected.
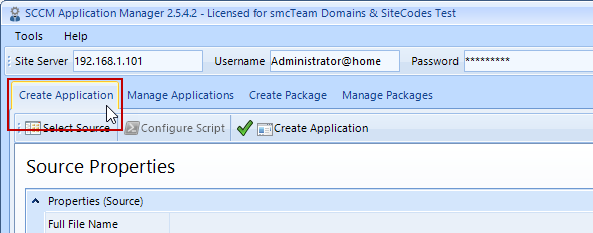
The creation of an application takes place in three steps.
- Select Installation Source (Select Source)
- Adjust the properties of the future application if necessary
- Create the application (Create Application)
Select Installation Source
After clicking on the button Select Source a special file browser opens, which works with shares.
The installation source can be selected within this share browser.
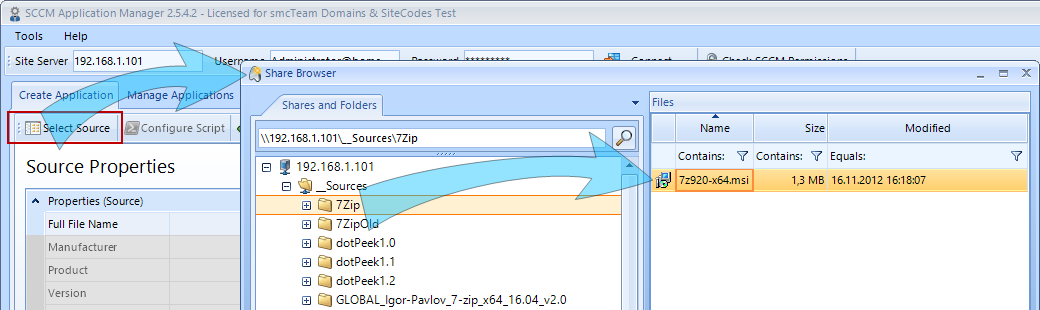
The SCCM Application Manager supports the following installation sources:
- Windows Installer files (*.msi, *.mst)
- Executable scripts (*.exe)
- PowerShell scripts (*.ps1)
- Command line scripts (*.cmd)
- VB scripts (*.vbs)
After pressing OK the SCCM Application Manager tries to read the properties of the installation source and displays them in the Source Properties area.
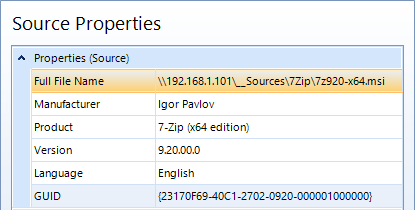
The reading of the properties from an installation source depends on certain factors:
-
For an MSI file, all properties can be read because they are mandatory.
- For executable files (*.exe), it depends on whether the manufacturer have been entered these properties in the header of the file. If not, these properties must be typed in by hand.
- For all scripts like *.ps1, *.cmd, *.vbs files it depends on whether regular expressions have been stored for each type of script, see this chapter. If not, these properties must be typed in by hand.
When working with scripts, the selected script is also displayed.
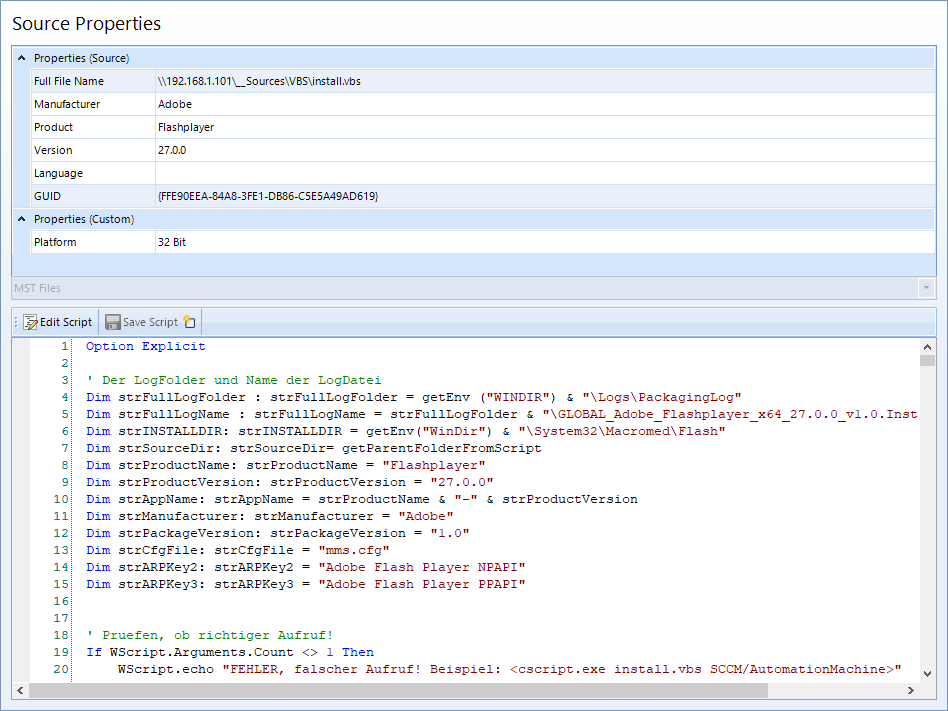
This script is read-only by default, but it can be edited after clicking the Edit Script button and saved with Save Script.
Installation Sources Without a Product Code
Typically, a product is identified by its product code. This product code, e.g. {894124B6-B1FF-4911-9BE0-8018E97167E2}, is stored within the Registry under:
HKEY_LOCAL_MACHINE\SOFTWARE\Microsoft\Windows\CurrentVersion\Uninstall\{894124B6-B1FF-4911-9BE0-8018E97167E2}
But there exist also installation routines that enter the name of a product or anything else:
In this case, the Uninstall Registry Key field is provided within the source Properties. This field can be filled in either by hand or by a regular expression, which is used to read the value from a script.
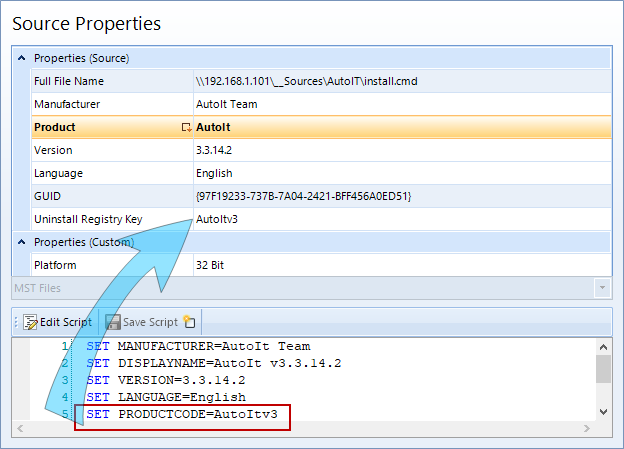
If it is not an MSI installation and a value is entered in the Uninstall registry key field, it overrides the value of the GUID when the application is created.
Modifying application properties if necessary
Within the deployment option drop-down list, you can select different advertisement options:

- One install deployment, one uninstall deployment (Standard)
- Two install deployments, one uninstall deployment
- One install deployment, no uninstall deployment
- Two install deployments, no uninstall deployment
- No deployments, application or package only
Application creation for devices or users
When creating applications, you can specify whether the associated collections should be created for devices or for users. For this purpose, the corresponding option must be selected before creating the application.

Allow end users to repair the created application
The creation of an application with repair command line is enabled via the Use Repair Option checkbox. Users will see an option to repair the application in the Software Center.

If the SCCM Application Manager was configured sufficiently in advance (see global Configuration, Application Configuration and Application Return Codes), subsequent adjustments are minimal. It is often enough to check if the Source Properties were fully read.
Werden Änderungen im Bereich der Source Properties vorgenommen, haben diese Änderungen direkten Einfluss auf die Application Properties. Das sind jene Eigenschaften, die bei der Erstellung der Applikation verwendet werden.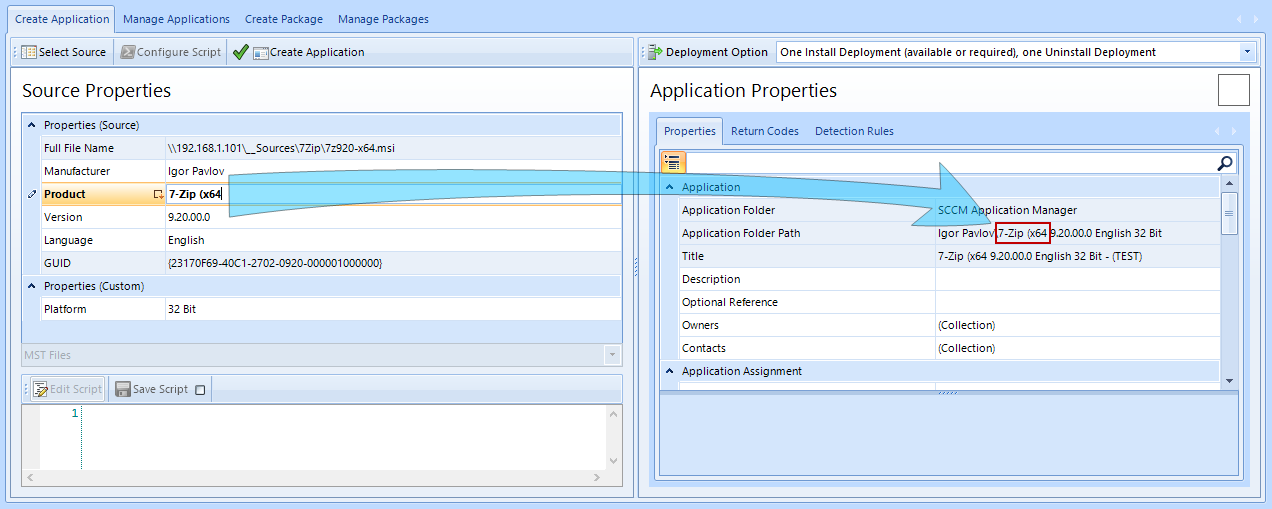
Soll die Applikation später im Software Center auf dem Client erscheinen, sollten folgende Einstellungen berücksichtigt werden:
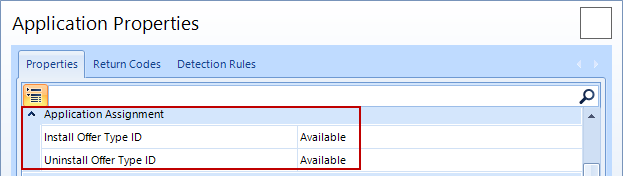
- Die [Un]Install Offer Type Ids sollten auf Available stehen.

- Die Applikation sollte ein Icon File besitzen, das hinzugefügt werden kann. Die Mindestgröße dieses Icons muss mindestens 32 x 32 Pixel betragen, da das Ergebnis im Software Center auf dem Client sonst unschön aussieht. Darüber hinaus darf das Bild max. 250 x 250 Pixel groß sein.
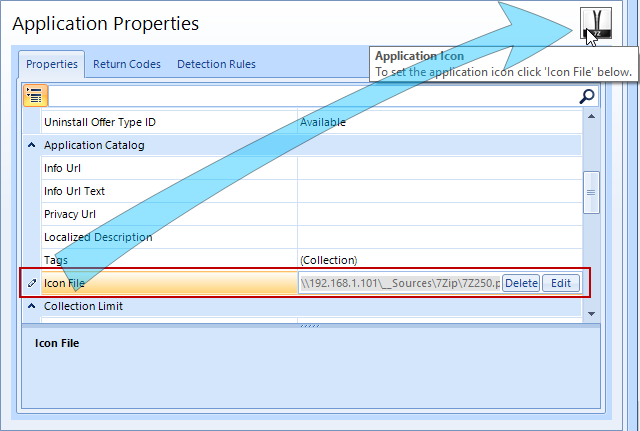
Seit der Einführung von Microsoft® System Center Release 1710 werden größere Symbole nicht mehr verzerrt dargestellt. Nähere Informationen dazu siehe hier.

Angepasst werden können alle Application Properties, die weiß hinterlegt sind. Grau hinterlegte Eigenschaften können entweder indirekt über die Source Properties geändert werden, oder ihre Werte sind global hinterlegt (siehe globale Konfiguration und Applikationskonfiguration) und müssen dort verändert werden.
Im Tab Return Codes können zusätzliche Rückgabewerte definiert werden und im Tab Detection Rules können Vorlagen für Erkennungsregeln (siehe Applikationskonfiguration) ausgewählt oder angepasst werden.
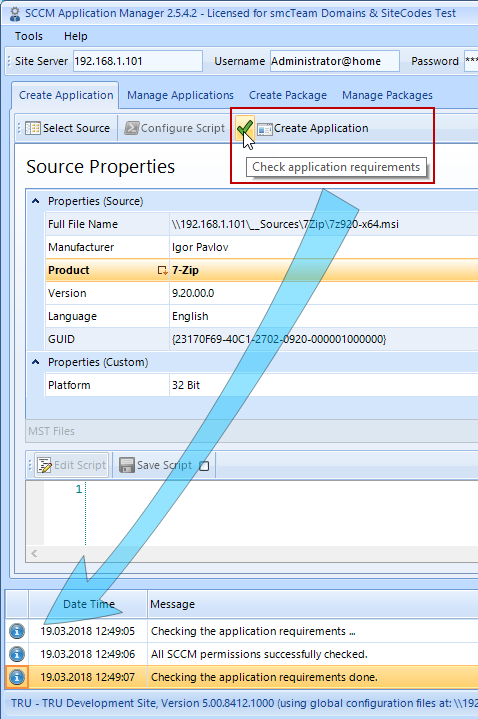
Applikation erstellen
Bevor eine Applikation erstellt wird, sollte überprüft werden, ob alle Einstellungen richtig vorgenommen wurden. Der Button mit dem grünen Haken () gibt Auskunft darüber. Wird dieser angeklickt, werden alle Einstellungen überprüft. Innerhalb der Statusmeldungen werden etwaige Fehler angezeigt. Eine Applikation wird in diesem Fall noch nicht angelegt.