Quick Start Guide
Introduction
The Asset Manager Web Client is a browser-based application for managing data and objects (assets). For example, you can use it to:
Login
- Launching the application: After opening the browser, you must enter the URL where the Asset Manager Web Client is hosted (e.g.,
https://<YourDomain>/AssetManager). - Login: You can log in either via an Azure login (cloud version) or using pass-through authentication if the Asset Manager Web Client is deployed on-premises. After successfully logging in, you will be taken to the main page.
Note: Depending on the configuration, automatic single sign-on (SSO) may be enabled, so no separate login is required.
The User Interface
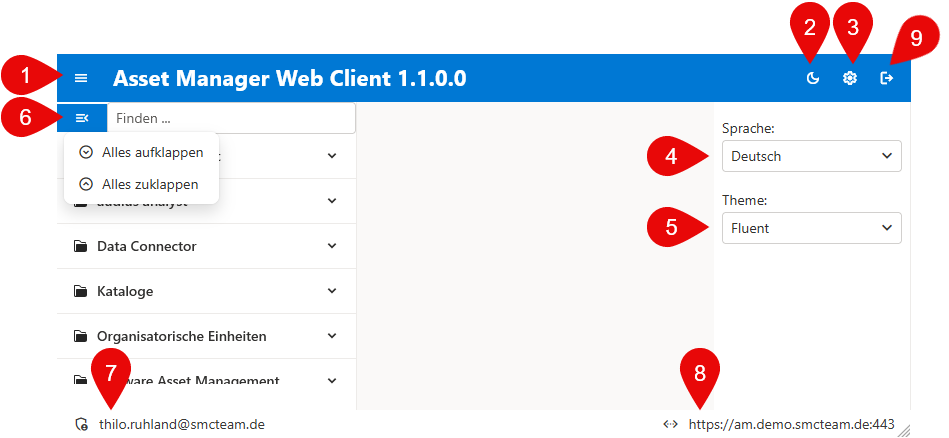
The following list describes the points mentioned above regarding the user interface:
Navigation and data

The following list describes the points mentioned above regarding navigation and data editing:
- Search field for filtering navigation entries
- Expandable navigation structure with menu items
- Selecting a menu item, followed by the display of tables, queries, reports, or dashboards
- If the menu item is a table, the corresponding record can be selected for further editing
- The record is displayed
- A new record can be created*
- An existing record can be edited*
- A record can be deleted*
- If there are many records, pagination is generated, allowing navigation using the corresponding buttons
- Displays the type of menu item, the number of rows, columns, and cells, as well as the number of pages
* Action can only be performed with the appropriate permissions.
Filtering, grouping, and sorting data
- Search: Using the search field in the navigation.
- Filtering: In the table column headers.
- Sorting: By clicking on the column headers.
- Grouping: Using the group icons in the columns.